The following tutorial shows how to make a reconstruction and get a evaluation result. This tutorial uses COLMAP and Ignatius dataset for quick start.
1. Prepare Images
Download the image set or the video of Ignatius dataset from the download page. For the image set, unzip the package and go to step 2. For the video, use the following script to sample key frames from the video (These tools are required: ffmpeg, mogrifyand exiftool):
Get jpg images from the video:
> ffmpeg -i Ignatius.mp4 -q:v 1 -vf fps=1 Ignatius/%06d.jpg

Resize:
> mogrify -quality 100 -resize 50% -path Ignatius2/ Ignatius/*.jpg

Write EXIF data:
> exiftool -overwrite_original -FocalLength="21" -focallengthin35mmformat="21" -make="Sony" -model="A7SM2" Ignatius2/*.jpg
2. Make a Reconstruction
Download and install COLMAP. Follow the installation guidelines and the COLMAP tutorial to make a reconstruction of our Ignatius2 image set obtained from step 1. Alternatively, you can run this script which includes all necessary steps of the COLMAP pipeline to produce a reconstruction:
> sh get_colmap_reconstruction.sh [COLMAP-exe-directory] [image-set-directory] [project-directory]
After a successful run, the reconstruction "fused.ply" can be found in the [project-directory]/dense folder. The next step is jumping to Appendix A to prepare a *.log file to prepare evaluation.
3. Evaluation
This tutorial uses Ignatius, one of the training datasets. Please follow step 3-1 to perform an offline evaluation for Ignatius. If you are working on a testing dataset and considering submission, please jump to step 3-2. For more details regarding evaluation metric, see Appendix B.
3-1. Offline evaluation for training set
The reconstruction of training set can be evaluated using public ground truth. Since the SfM reconstruction has arbitrary scale and orientation, it is necessary to exactly align the reconstruction with the ground truth. This can be done automatically by using Open3D and our evaluation script. To install Open3D, please follow this instruction. To use our evaluation script, clone TanksAndTemples github repository and follow the instructions shown in our evaluation README. You can download the Ignatius ground-truth file as a reference.
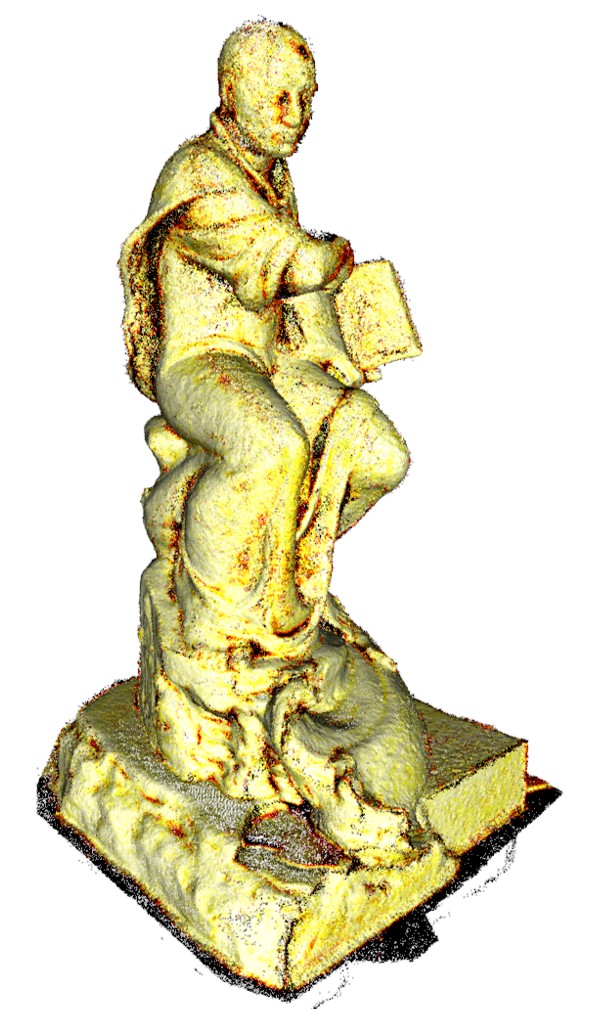
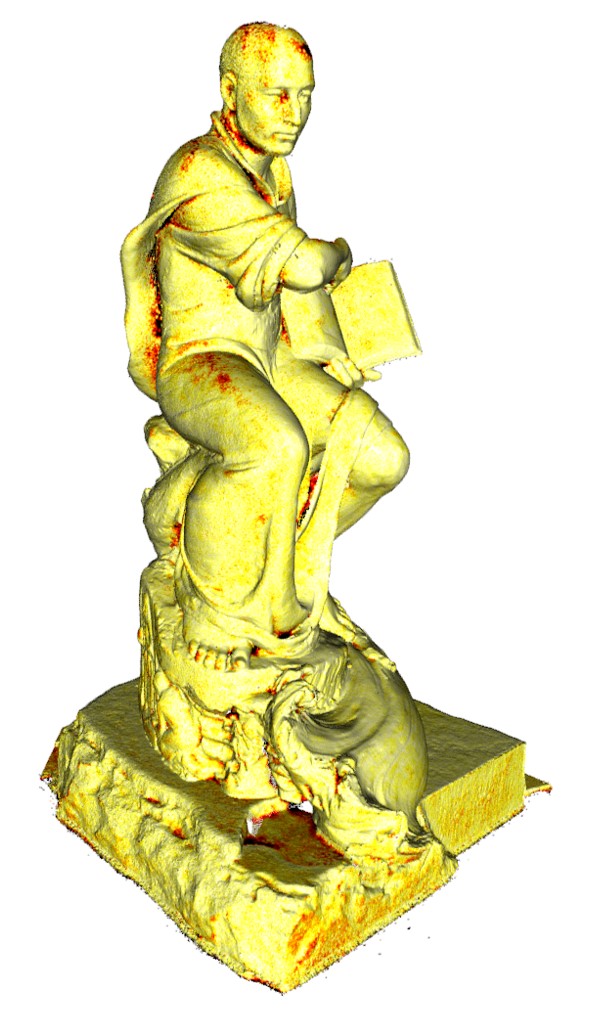
The followings are evaluation results:
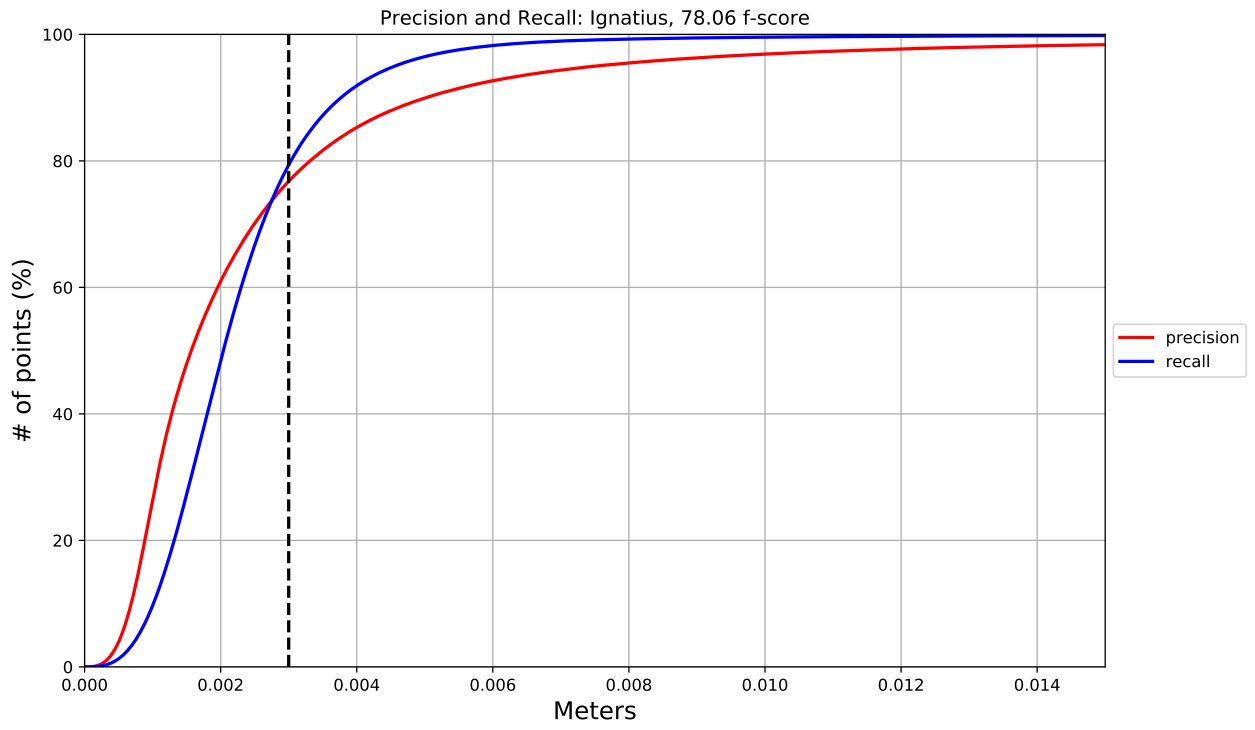 precision and recall curve with F-score
 precision
 recall
Alternatively, MeshLab or CloudCompare cab be used for evaluation too. Make sure you set the ground-truth file as a reference, and align the reconstruction to it.
3-2. Online evaluation for testing set
This case uses a dedicated server for the evaluation. It is based on the same evaluation pipeline used for the offline case, but the ground truth geometries are not public. Instead, the result can be posted on the leaderboard. Please go to the submission page and follow the instruction. Note that models in either the intermediate or the advanced set need to be reconstructed for submission.
Appendix A. Convert SfM files into log format
For an evaluation, the camera poses need to be stored in *.log format. An example of a log file can be seen here. Every input image needs to have an entry in the log file, regardless if it is recognized as a valid view in the SfM bundle or not. It is okay to have some inaccurate camera poses. The back-end of our evaluation server is robust to such cases. However, we do recommend to estimate the camera pose as good as possible.
To convert the COLMAP SfM data to the log format you can use this python script and follow the instructions below. The script can also be used to convert MVE or VisualSfM SfM data.
Case 1: Reconstruction from an image set
If you used the pre-sampled image set provide on our download page, you only need to run the following script to convert the SfM data into our log file format:> python convert_to_logfile.py [COLMAP SfM file] [output log-filename] [folder of the input images] [COLMAP/MVE/VSFM] [image format] Example to get the *.log file of the COLMAP reconstruction of this tutorial: > python convert_to_logfile.py Ignatius_COLMAP/sparse/0/ cameras.log Ignatius_COLMAP COLMAP jpg Example to get the *.log file of a MVE based SfM file: > python convert_to_logfile.py mve-folder/synth_0.out mve.log mve_test/views/ MVE Example to get the *.log file of a VisualSfM based SfM file: > python convert_to_logfile.py vsfm-folder/result.nvm vsfm_log.log vsfm_test/ input_images/ VSFM jpg
If you convert COLMAP SfM data you will need the COLMAP read_write_model.py script in the same folder you are executing the this script from.
Case 2: Reconstruction from a video
If you used the video and sampled your own set of images, it is important to submit a log file which includes interpolated camera poses for all the individual frames of the video. First, create a log file (cameras.log) using the script in Case 1. Then edit a mapping.txt file that includes information about which video frames you sampled. For this tutorial example it would look like the following:
[number of input camera poses]
[number of frames in the video]
[Image ID] [video frame ID] : (repeat for every image)

Example mapping file of this tutorial:
263
7845
0 1
1 31
2 61
3 91
4 121
...
Make sure that there are no empty lines in the mapping file. The full mapping file for this tutorial can be downloaded here. Using the log file interpolation function from our toolbox you can now generate a log file (Ignatius.log) which includes interpolated camera poses for every frame:
> python TanksAndTemples/python_toolbox/interpolate_log_file.py cameras.log Ignatius_mapping.txt Ignatius.log
If Ignatius would be part of our test set, you could just take the Ignatius.log file and rename the reconstruction to "Ignatius.ply" and do this for all other reconstructions of the advanced or intermediate set, and you would be ready to make a submission. Check the Submit section of this site for further details on how to proceed with a test set submission.
Appendix B. Compute F-score
Our evaluation computes F-score using the following equations. Let \( \mathcal{G} \) be the ground truth and \( \mathcal{R} \) a reconstructed point set being evaluated. For a reconstructed point \( \mathbf{r} \in \mathcal{R} \), its distance to the ground truth is defined as: \begin{equation} e_{\mathbf{r} \to \mathcal{G}} = \min_{\mathbf{g} \in \mathcal{G}} |\mathbf{r} - \mathbf{g}| . \end{equation} These distances can be aggregated to define the precision of the reconstruction \( \mathcal{R}\) for any distance threshold \( d \): \begin{equation} P(d) = \frac{100}{|\mathcal{R}|} \sum_{\mathbf{r} \in \mathcal{R}} \big[ e_{\mathbf{r} \to \mathcal{G}} < d \big] \label{eq:precision} \end{equation} where \( [\cdot]\) is the Iverson bracket. \( P(d) \) is defined to lie in the range [0,100] and can be interpreted as a percentage. Similarly, for a ground-truth point \( \mathbf{g} \in \mathcal{G} \), its distance to the reconstruction is defined as \begin{equation} e_{\mathbf{g} \to \mathcal{R}} = \min_{\mathbf{r} \in \mathcal{R}} |\mathbf{g} - \mathbf{r}| . \end{equation} The recall of the reconstruction \( \mathcal{R}\) for a distance threshold \( d \) is defined as \begin{equation} R(d) = \frac{100}{|\mathcal{G}|} \sum_{\mathbf{g} \in \mathcal{G}} \big[ e_{\mathbf{g} \to \mathcal{R}} < d \big]. \label{eq:recall} \end{equation} Precision and recall can be combined in a summary measure, the F-score: \begin{equation} F(d) = \frac{2P(d)R(d)}{P(d)+R(d)}. \label{eq:f-score} \end{equation} The F-score at a given threshold \( d \) is the harmonic mean of precision and recall at this threshold. It has the property that if either \( {P(d)\rightarrow 0}\) or \( {R(d)\rightarrow 0}\), then \( {F(d)\rightarrow 0}\). It is thus a better summary measure than the arithmetic mean, which does not have this property.